Sunday, January 17, 2016

Holy Guacamole

What You Will Need: Avocado's, cilantro, lime, onion, tomatoes, chili powder, cumin & salt.

When picking out your avocado's, you want a soft give when you press it. Or buy firm ones and place on the counter for a couple days to soften.


Dice up onions & tomatoes.


Slice the avocado in half & remove the seed.


Using your knife, slice in one direction then cut the opposite way to create nice square chunks. 


Take a large spoon and scoop out the bits.


Squeeze fresh lime juice over the avocado. Start with half a lime, then if at the end you would like more of a zesty flavor, add more.


Sprinkle in just a touch of cumin & chili powder. Season with salt.


Now, I'm a huge fan of cilantro so I add in a generous amount!


Combine everything throughly, taste & make any adjustments you like. Maybe add in a dash of cayenne pepper for some spicy guac!


I could eat guacamole by the spoonful!


Eat it as a dip or use it as a topping on taco night!!


Enjoy & Always Cook with Love!

Tuesday, January 12, 2016

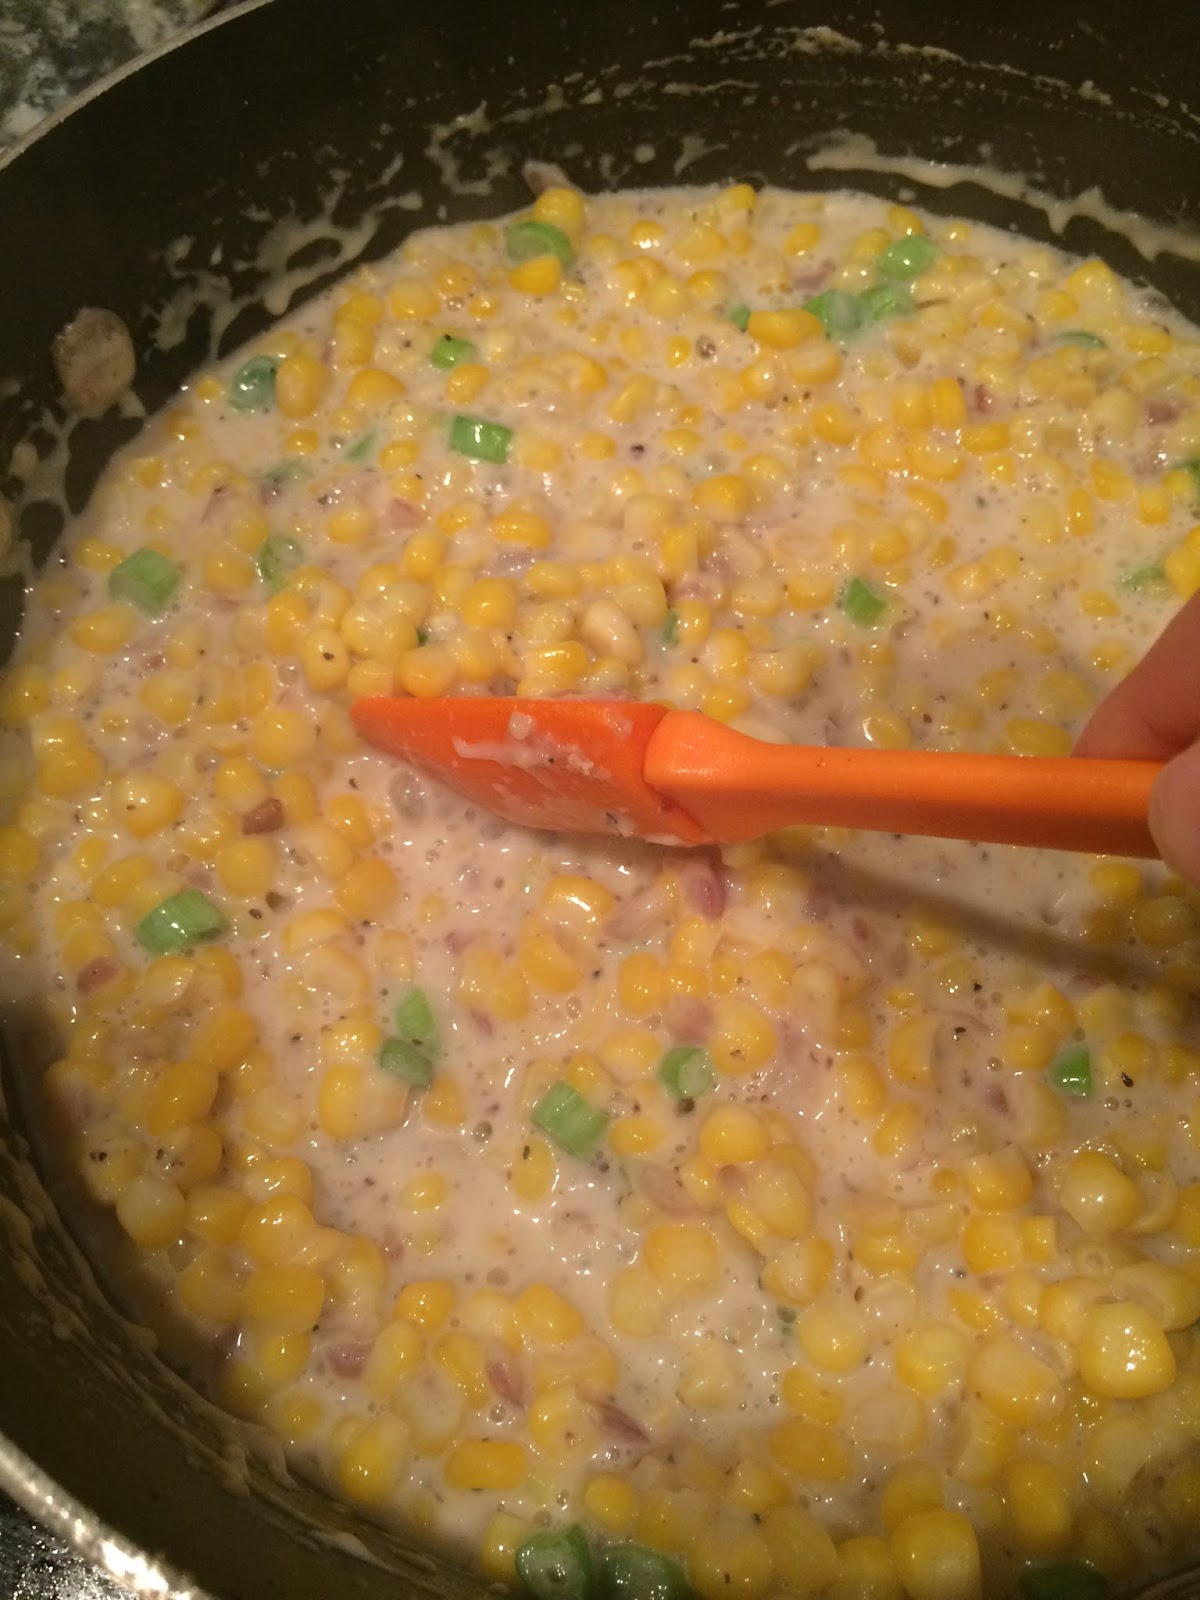
Creamed Corn

A couple years ago I stopped using canned vegetables completely.

Now, if I can't get it fresh, I'll settle for frozen.

About two years ago, I had the urge to make creamed corn for a side dish but I had never had it other then in a can.

So I came up with this recipe & I'm never going back!

What You Will Need: Corn (fresh or frozen), onion, garlic, flour, parmesan cheese, milk or cream, bacon, salt & pepper.


Like so many of my recipes...start by crisping up your bacon. Set aside.


Drain off majority of the fat. Return to the heat and add in the diced onions. Cook for 2-3 minutes.


Add in diced garlic, cook for another 1-2 minutes.


Add in the bag of frozen sweet corn or 5-6 shaved fresh ears of corn.


Mix & sauté for 3 minutes.


Add in about 2 spoonfuls of flour.


Stir, making sure your cooking all the raw flour.


Add in your milk or cream.


If desired, add in chopped green onions.
Bring to a bubble & adjust to desired thickness.


To finish, add in about a 1/4c. parmesan cheese.


Serve as a side dish or....


Use it as a bed for homemade Gnocchi with the crispy bacon to top it all off!


This recipe can be used in rice, pasta, roast/oven baked chicken, steak or seared scallops!

The possibilities are endless & scrumptious...if I do say so myself!!!

---------------------

Enjoy & Always Cook with Love.


Monday, January 11, 2016

Sweet Potato Gratin

Sweet potatoes are more then just a dish served at the holiday table topped with spices and marshmallows.

Im a sucker for sweet potatoes but never do I prepare them with butter and sugar. I like them to have a more savory taste. 

Here is a wonderful way to prepare them for a delicious side dish any night of the week!

----------

What You Will Need: Sweet potatoes, garlic, green onions, bacon, parmesan cheese, panko bread crumbs, half/half or heavy cream and butter.

Preheat your oven to 350


Start by cooking your bacon till crispy. Set aside.

Scrub your potatoes clean and slice them with a mandoline.
If you don't have an adjustable slicer, carefully use a sharp knife.


I keep the skins on, but it you want to remove them make sure you do it before you slice them.

Place the slices into a bowl.


Coat them with the half & half. You want enough so there is a little creamy pool in the bottom of the bowl. 


Get the green onions, garlic & bacon all diced and ready to go!


Butter your baking dish.


Start with a single layer of the soaked sweet potatoes then top with

garlic
green onions
bacon
parmesan cheese
salt/pepper


Repeat after each layer of potatoes. With the leftover half and half at the bottom, pour it all over the top, then give a generous coating of the panko.


Top with butter.


Bake covered for about 20-30 minutes. Then uncover for about 5-10 to let the panko brown on top.

Cooking time will depend on the depth of your gratin and or the thickness of your potato slices.


A wonderful side dish to any meal or a great twist on a classic holiday table.

We had this along side some thick sliced ham & steamed vegetables. My husband, the lover of spiraled honey baked ham, went up for a second helping of the sweet potatoes instead of the pork.

Now, thats what I call winning!!!!


Enjoy & Always Cook with Love!

Wednesday, January 6, 2016

Birthday Cake; Part 2

I sometimes wish that I enjoyed baking more. I feel bad for my Kitchen Aid that only gets pulled out of the pantry a couple times a year. 

I see plenty of sweet treats that I would love to try, but the thought of measuring, baking, cooling....its just a turn off for me. 

But, I do really love making cakes for my family.

When I first started making cakes, I really tried to make every part eatable, but now I get creative & use all different materials to create a fun product.

This is my nephew Alan's 1st birthday cake.

Some kitchen twine, two skewers & paper help bring this cake to life! 
I did a chocolate cake & dropped small dollops of peanut butter throughout the batter before I baked it for an extra tasty surprise. 


My other nephew Avin turned 3 this year and is a huge fan of monkeys so of course I had to make him a monkey cake!


That smile means everything!


Moist, delicious banana cake with cream cheese frosting! My sister, who is a very harsh critic of my food, loved this cake! 


For my baby shower, I went back to a known crowd pleaser....the Donut Tower!! 
And any leftovers are great with your coffee the next morning.

I also loved making the diaper cake!


The latest cake was for my niece who turned 6 & requested a horse cake.
I spent several days searching the internet trying to find inspiration for a horse cake that I thought I would be capable of doing.

Well, I was having zero luck and was about to ask her for another idea when I saw a carousel cake. 
I ran to my local dollar store, found some wonderful crafts & got to work! 


Wrapping sugar around sugar is always a good idea right.....??


I loved being able to use some fun craft items, a hot glue gun & lots of sugary treats to make this beauty!


My niece was so surprised when I arrived to her party with a My Little Pony Carousel Cake!
I got one heck of a big hug & kiss for this birthday treat!


-------------------------

Now I get to look forward to creating birthday cakes for my own son! Even though Ive got several months to go before his first birthday, Ive already been looking for ideas! 

So even tho I don't like baking on a daily, weekly or monthly basis...the couple times a year that I do, it really is so rewarding!

--------------------------

Enjoy & Always Bake with Love!


Tuesday, January 5, 2016

5 Onion Burger

I was very excited to tell my husband the other night that I thought of a new recipe to try. He is a big fan of burgers so I told him about my idea for 'Dueling Onion' Burgers. Caramelized onions meets crispy fried onions of a big fat patty!! Don't forget the cheese!!!!!

While at the grocery store, trying to pick out the best buns, he spotted Onion Buns, which he had to have! So now it was a Trio of Onion Burger.

On the way home, I decided that I would add diced raw onions & sliced green onions to the meat mixture, just incase the other usage of onions weren't enough!

And there you have it...the birth of the 5 Onion Burger!

------------------------

What You Will Need: Ground beef, ground pork, green onions, red onion, fried onions, cheese & onion buns.

**Preheat your broiler to high

The day before, I combined the ground beef with the pork. Into the meat mixture went diced raw red onions & sliced green onions, salt/pepper. It was covered and placed in the fridge overnight. If you don't have time to do overnight, try for at least 30 minutes.


In a saute pan, heat your olive oil and add in the sliced onions. Salt/pepper. 

Keep it at a medium/low heat and stir occasionally.


After about 15 minutes, the onions should start looking deep brown & delicious! Turn to low and continue to cook.


Form your burger patties. I would suggest going big to give them surface area to pile on all the goodies!!


Heat an oven safe pan and sear the meat.


Cook the burgers to your desired doneness and top each one with plenty of the sweet caramelized onions.


Top with a good amount of your cheese and place under the broiler. 


Mmmmm....


Place on the toasted onion bun, top with a handful of the fried onions & any other burger additions you like..lettuce, tomato, mayo...etc.


Before I took a bite, I was worried that all the onion would be overpowering but there was no need to fret! 

This burger is going to be loved by all onion fans!! Each use of the onion was its own tasty treat to this dish!! 

------------------

Enjoy & Always Cook with Onions...& Love!!